


Help! My Clumps Are Sticking: How to Fix [Wet Litter Issues]
by Laura Jane on May 20, 2026
Sticking litter clumps are a leading customer complaint and a critical failure point for any litter box system. When clumps turn to 'cement,' it signals a breakdown between the litter, the box, and the user's technique, leading to a poor experience and negative product reviews.
This guide provides a systematic framework for diagnosing and fixing the root cause of stuck-on waste. We'll cover the most effective adjustments, starting with a 14-day diagnostic period to establish a baseline before making changes. Then we will analyze the impact of litter depth, sifting methods, and anti-stick sprays, giving you the technical data needed to solve this common problem for good.

Expected Outcome (Clean Mesh)
A 'clean mesh' outcome means the litter box surface is completely free of stuck-on clumps and residue. The stainless steel acts like a perfectly embedded reinforcing mesh, preventing adhesion and ensuring a smooth, easy-to-clean surface, similar to engineering standards for non-porous, durable finishes.
What a 'Clean' Surface Looks Like
A truly clean surface allows litter clumps to release completely without leaving any residue or fragments behind. After you scoop, the surface of the box remains smooth and flat, with no visible buildup or stuck-on material. This results in a durable, non-porous finish that resists adhesion and makes daily cleaning simple and effective.
Technical Properties of a Non-Stick Surface
The stainless steel surface functions like a high-performance industrial mesh, achieving full separation from the "base coat" formed by a litter clump. Its performance is analogous to materials meeting the ASTM E2098 standard for alkali resistance, which prevents chemical bonding from urine. The surface's integrity also mirrors the durability of materials rated for high impact resistance (90-150 inch-lbs) under ASTM E2486, ensuring it remains smooth and undamaged by scooping.
Before You Begin: Diagnosis
Before changing your litter or box, treat the situation like a diagnostic test. For at least 14 days, monitor your cat's behavior and verify that the box size, litter depth, and placement are correct. This helps separate behavioral or environmental problems from true litter performance issues.
Establish a Quantitative Baseline
Before you change your litter or cleaning methods, monitor your cat for at least 14 days to establish a consistent baseline. Log daily data points, including the number of urine visits, clump size category (small, normal, or large), and body weight. Note any behaviors like straining or vocalizing. A smart monitor, such as Petivity, can automate this by tracking weight, visit frequency, and duration, effectively converting the litter box into a diagnostic tool. This data helps you and your veterinarian distinguish between a simple litter problem and a potential health issue.
Verify Physical Setup and Environment
Proper setup is essential for gathering reliable data. Follow the N+1 rule by providing one more litter box than the number of cats in your home to reduce competition. Ensure each box's length is at least 1.5 times the cat's length (from nose to tail) and the entrance is below 7.5 inches (19 cm) for easy access. Maintain a shallow litter depth of 1–2 inches (25–50 mm) to provide stable footing, which can affect urination posture. Any automated boxes or scale-based monitors must be placed on a flat, hard, and level surface with no mat directly underneath to ensure accurate sensor readings.
Step 1: Check Litter Depth
The ideal litter depth is generally 2-3 inches. Excessive depth, often over 4 inches, allows urine to saturate the bottom layer, creating hard, cement-like clumps that stick to the box. Adjusting the depth is the most common and effective first step in troubleshooting this issue.
Before changing litter types or buying new equipment, the first and most critical adjustment is to measure the litter depth. Many cat owners believe more litter is better, but excessive depth is the leading cause of clumps sticking to the pan. Urine needs time and space to be absorbed and form a solid clump. When the litter is too deep, the liquid filters straight to the bottom, creating a saturated sludge that hardens against the plastic.
| Scenario | Recommended Depth | Reasoning |
|---|---|---|
| General Use / Most Cats | 2–3 inches | Balances digging comfort and absorption, preventing urine from pooling at the bottom. |
| Strong Clumping Litters | 3–4 inches | Ensures the clump can solidify completely before urine reaches the pan bottom. |
| Signs of Depth Aversion | 1–2 inches | Creates a softer, more inviting surface for cats sensitive to deep substrates. |
Why Too Much Litter Creates 'Cement'
When the litter bed is too deep, typically 4 inches or more, urine seeps through the entire layer before the clumping agents can activate. This process saturates the bottom layer of litter with liquid, which then fuses directly to the surface of the pan. Over time, this saturated material hardens into a dense, cement-like mass. Not only is this difficult to scoop, but some cats also develop an aversion to digging in excessively deep substrate, which may lead them to stop covering their waste altogether.
Specific Depth Recommendations
Finding the right depth is a matter of balancing absorption with your cat's comfort. The standard recommendation for most clumping litters is a depth of 2-3 inches. This provides enough material for the cat to dig and cover waste, while also being shallow enough to form a clump before urine hits the bottom. For high-performance litters with very strong clumping action, a slightly deeper bed of 3-4 inches can be effective. If you notice your cat hesitates to use the box or perches on the edge, they might have a depth aversion. In this case, reducing the depth to a shallow 1-2 inches can make the box feel more stable and inviting.
The Last Litter Box You'll Ever Need
Step 2: The "Shake" Technique
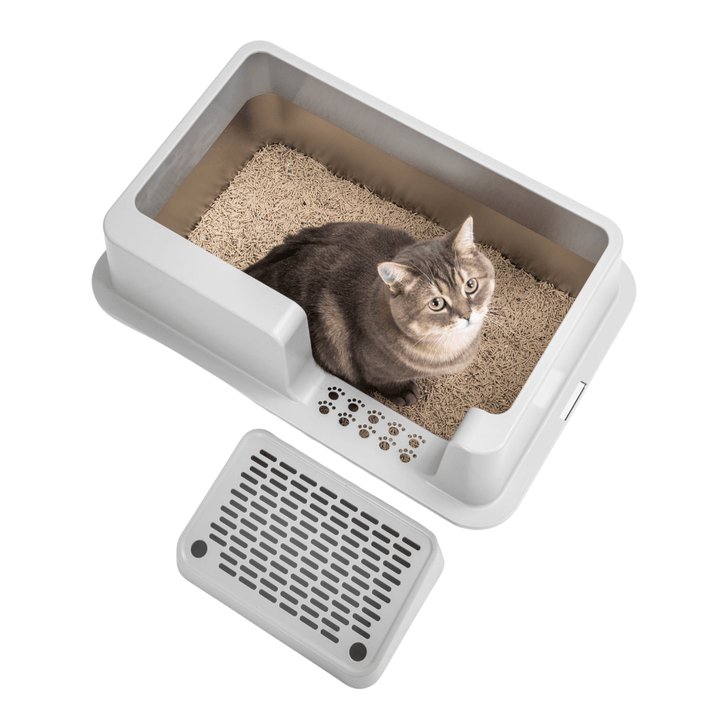
The 'shake' technique is a manual method for cleaning a litter box that uses a sifting tray. By tilting or gently shaking the box, clean litter falls through a screen, leaving clumps behind for easy removal. This process relies on gravity and proper screen geometry to work effectively.
| Sifting Method | Mechanism | Key Design Factor |
|---|---|---|
| Manual Sifting Trays | The user physically lifts and shakes or tilts the system to separate waste. | Screen geometry must be fine enough to catch clumps but large enough for granules to pass. |
| Automated Sifting Systems | A motor rotates a globe or bowl to pass the litter bed over an internal screen. | Engineered tilt angle, rotation speed, and acceleration dislodge even sticky clumps. |
The Physics of Sifting: Gravity and Geometry
The sifting technique relies on controlled tilting and vibration. When you shake a sifting litter box, you use gravity to let clean, loose litter fall through a screen or mesh insert. The success of this process depends entirely on the screen's geometry. Its openings must be large enough for unused granules to pass through freely but small enough to trap waste clumps. This method works best with firm clumping litters that form solid, cohesive masses. If clumps are soft or fragile, they can break apart during shaking and contaminate the clean litter.
Manual vs. Automated Sifting in Practice
Manual sifting systems, like those with stacked trays or stainless steel inserts, require you to do the lifting and shaking. This physical effort separates the clumps and can reduce litter consumption by up to 30%. Automated systems mechanize this same principle. The Litter-Robot, for instance, rotates its entire globe at a steep 90° angle, passing the whole litter bed over a sifting screen. More advanced designs like Popur’s Split Litter System use a two-stage tilt combined with a 'catapult' action. This generates extra acceleration to help peel and launch sticky clumps off the surface, improving cleaning efficiency without direct contact.
Step 3: Anti-Stick Sprays?
Anti-stick sprays apply a temporary, low-adhesion coating to the litter box surface, often using food-grade mineral oil. This hydrophobic layer prevents wet clumps from bonding to the plastic. You typically spray a thin coat on a clean, dry box, let it dry, then add litter.
How Sprays Create a Non-Stick Surface
Anti-stick sprays work by applying a thin, low-adhesion coating to the inner surfaces of the litter box. Many of these sprays are based on food-grade mineral oil, which creates a slick film that reduces friction and prevents clumps from getting a strong grip on the plastic.
This coating forms a hydrophobic, or water-repelling, layer. Because wet litter clumps are unable to directly bond with the plastic, they release easily during scooping instead of cementing to the bottom or sides. Some liquid liner products go a step further by filling in the microscopic pores and scratches in the plastic, creating an even smoother, anti-static surface that actively repels waste.
Application and Product Types
Most spray products require a simple application process. You start with a clean, completely dry litter box, apply a light coating to the inner walls, and let it flash-dry for about three to five minutes before adding litter. Wiping any excess liquid prevents pooling and ensures an even coat.
The duration of the non-stick effect varies by product. Consumer sprays like Lady N suggest reapplication approximately every three months. In contrast, sealer products such as Mr. Hard Water Cat Litter Box Liquid Liner are more concentrated; a single 8 oz bottle can treat about 50 litter boxes. If you prefer a solution that requires no reapplication, some litter boxes feature a built-in non-stick surface, offering a permanent hardware alternative to sprays.
Final Thoughts
Dealing with stuck-on litter clumps often feels complicated, but the solution is usually simple. Before you invest in new gadgets or special formulas, check your litter depth. Keeping it between 2 and 3 inches is the most reliable way to stop urine from pooling at the bottom and turning into cement. This single adjustment solves the problem for most cat owners.
If adjusting the depth isn’t enough, a methodical approach works best. Experimenting with sifting techniques or a non-stick spray can provide that extra help. The goal is to create a litter box environment that is consistently clean and stress-free for your cat. A dry, easy-to-clean box means a cleaner scoop for you and a more comfortable space for your pet.
Frequently Asked Questions
Why does litter get stuck to the sifting box?
Litter sticks when moisture and fine particles create a bond with the box's surface. Clumping litters are designed to form solid clumps that separate cleanly. If the litter is too wet, too fine, or the box surface is rough, the clumps smear and stick instead.
Can I use a non-stick cooking spray on the sifter?
Using consumer non-stick sprays is not recommended. Professional-grade equipment relies on highly polished stainless steel surfaces for its non-stick properties, not external sprays. Any coating for a pet product would need to be certified as safe, which generic cooking sprays are not.
What's the best way to clean the sifting mesh?
Use a soft-bristle brush with warm water and a mild detergent. Brush the underside of the mesh with a gentle circular motion, then rinse and let it air dry. For tough buildup, an ultrasonic bath at 37 kHz can be effective. Avoid using high-pressure water or harsh chemicals.
Is my litter too shallow?
Litter depth is crucial. It should be kept between 2 and 4 inches. Specifically for clumping litter, a depth of 3 to 4 inches is needed to prevent wet clumps from forming on the bottom of the box and sticking.
Why does my sifting box get clogged?
Clogging usually happens for two main reasons. First, using the wrong type of litter, like non-clumping varieties or pine pellets that turn to sawdust. Second, having the litter too deep (over 3 inches), which can cause clumps to get jammed in the sifter.
Feline Pine vs. Tractor Supply Horse Bedding: Is It Safe for Your Cat?
Don't Dunk It! How to Clean Your Smart Ionizer Module
Do Cats Hate Metal? Debunking Myths About Coldness and Noise